Plumbing and Wiring the Site
Preparation of the PVC pipe and installation of the cables can be done in several possible orders, but this one has worked well:
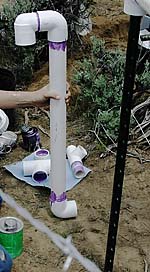
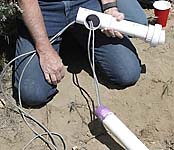
- Create the "gooseneck" from a 2.5-foot section of PVC, two standard 90-degree fittings, and one street-90-degree fitting. Prime and glue all connections, as shown on the left. The solar panel and GPS cables will first be pulled through the gooseneck and then (later) into the electronics enclosure.
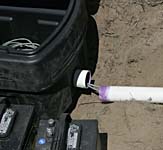
- Screw the 2" pipe-to-male fitting through the fitting in the top of the barrel, using a rubber gasket and teflon tape on the threads. Tighten securely.
- Prime and glue a standard 90-degree fitting to the pipe-to-male fitting, making sure the opening in the 90 points directly away from the center of the barrel.
- Prime and glue a street-45-degree fitting to the above 90, making sure the opening points downward.
- As a separate assembly, prime and glue a standard 45-degree fitting to a short section of pipe.
- Prime and glue that short section to one side of a threaded disconnect fitting.
- Prime and glue a random length of pipe to the other side of the standard 45-degree fitting. Make sure the pipe is long enough for the next step!
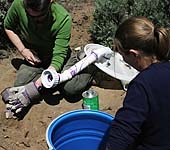
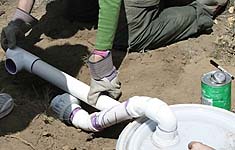
- Mark and cut the pipe attached to the 45-degree fitting (above) so that when glued to the 45-degree fitting on the barrel lid, the threaded disconnect fits in the trench. Prime and glue into the 45-degree fitting on the lid.
- Prime and glue a random length of pipe to one side of the "T" fitting. Make sure the pipe is long enough for the next step!
- Mark and cut the pipe from the above step, so that the "T" fitting falls into the correct location in the intersecting trenches when the pipe is glued to the open side of the threaded disconnect. Prime and glue into place.
- Mark and cut a length of pipe to connect the gooseneck (which should already have cables pulled through it) to the side of the "T" connector. It may be necessary to use two lengths of pipe with a glue coupling. Prime both ends of the pipe, the gooseneck, and the "T".
- Thread the cables through the length of pipe (above), through the "T", and out in the direction of the electronics enclosure. Carefully glue the pipe to the gooseneck; avoid getting excess glue on the cables.
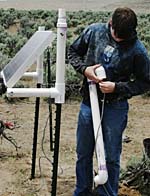
- Carefully glue the other end of the pipe to the side of the "T" connector; avoiding getting excess glue on the cables. This step will require at least one other person, to push and turn at the gooseneck end while seating the pipe into the "T". When done, the "T" and all pipe runs should be horizontal, and the gooseneck should extend vertically next to the fence post at the solar panel.
- Prime and glue a random length of pipe to the female-PVC-to-female-pipe-thread adapter. Make sure the pipe is long enough for the next step!
- Mark and cut the pipe so that it is the proper length to extend from the "T" to the electronics enclosure.
- Thread the solar panel and GPS cables through the pipe and fitting.
- Prime and glue the pipe and fitting into the "T" while avoiding getting excess glue on the cables.
- Thread the cables through a rubber gasket, and into the electronics enclosure through the drilled hole.
- Put a rubber gasket on the female-PVC-to-male-pipe-thread adapter. Thread the cables through the adapter, inside the enclosure.
- Thread the adapter through the drilled hole in the enclosure, through the rubber gasket, and into the female threaded adapter. Tighten securely.
- Note: When preparing for station installation, a small container for the required PVC fittings and gaskets helps keep things organized and cuts down on the instances where someone needs to drive 1-2 hours each way to pick up a missing fitting. We used inexpensive disposable flower pots, but any type of bucket or box will do.
Now to install the sensor...

